ASP.NET Core Tutorial: SOAP Web Service in .NET Core
In this article, I’ll show you how to construct SOAP APIs in.NET Core, specifically.NET 6. Let’s begin by making a new project in Visual Studio.

Choose one of the following ASP.NET Core Web App or ASP.NET Core Web App (Model-View-Controller).
2. Choose ASP.NET Core Web App and create a project.


3. Create Business Logic Folder in Project.

4. Create a Service/Interface in that folder for SOAP APIs.

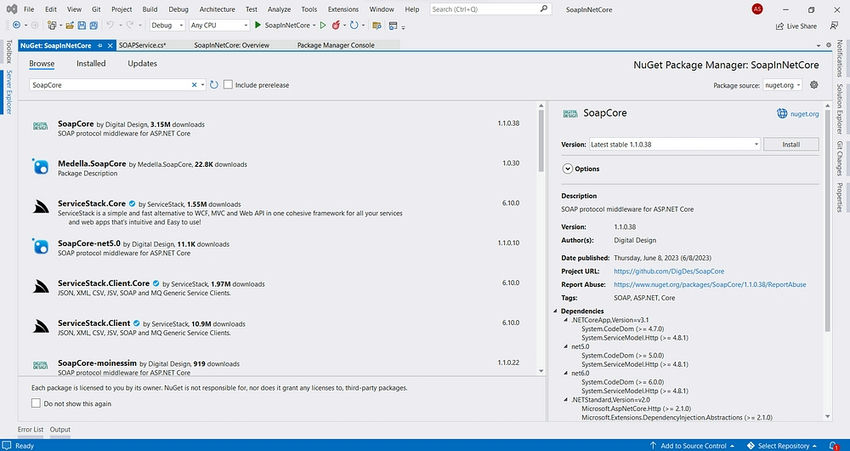
5. Add/Install SoapCore NuGet package from NuGet Package Manager.

6. Add the below code in your SoapService.
7. Now, we have to register the dependency and route of that service in the Program.cs class.
In the provided code snippet, I’ve registered the SoapService dependency and configured the endpoint for SoapService.
8. Now run the project and redirect to the endpoint /Service.asmx.

To consume SOAP service in .NET
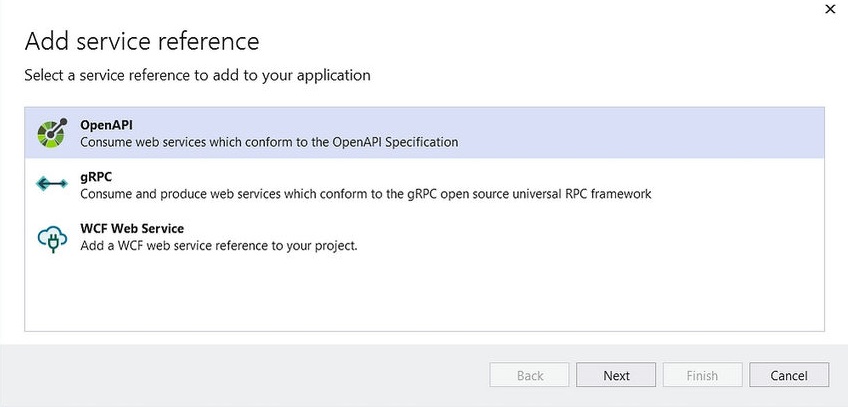
1. Add service reference in Client Project and choose WCF Web Service.

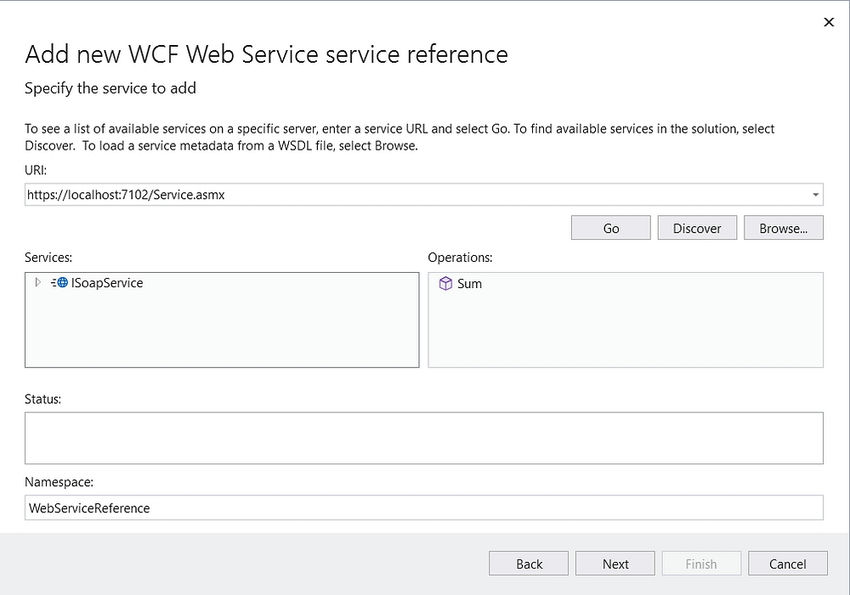
2. Now, in the URL, place your SOAP Service URL and click on the Go Button to check service has been exposed. As we can see that we have one endpoint called Sum, which we can consume in our client project.

Click on the Next button, and finish the setup.

As you can see above, SS Service Reference has successfully been added.
Now, proceed to include the following line of code in the section where you want to consume this service.
You can also consume this service from Postman.

ASP.NET Core 6.0.21 Hosting Recommendation
HostForLIFE.eu
HostForLIFE.eu is a popular recommendation that offers various hosting choices. Starting from shared hosting to dedicated servers, you will find options fit for beginners and popular websites. It offers various hosting choices if you want to scale up. Also, you get flexible billing plans where you can choose to purchase a subscription even for one or six months.


