How to Download Data as CSV in C# Blazor App?
CSV (Comma-Separated Values) files are a popular choice for data storage and exchange due to their simplicity and ease of use. In this article, we will walk through the steps to download data as a CSV file in a C# application.
Understanding CSV Files
CSV files are text files that use a specific structure to organize data in a tabular format. Each line of the file represents a record, and each record consists of one or more fields, separated by commas.
Benefits of Using CSV Files
- Simplicity: Easy to read and write.
- Interoperability: Supported by various applications (Excel, databases, etc.).
- Lightweight: Less overhead compared to other formats (like XML or JSON).
Create a New Blazor App
To begin, create a new Blazor Server or Blazor WebAssembly project in Visual Studio.
- Open Visual Studio.
- Create a new project and select Blazor App.
- Choose Blazor Server App (or Blazor WebAssembly App based on your preference).
- Name the project and click Create
Define the Data Model
For this example, let’s create a simple model to represent the data that we want to export as CSV.

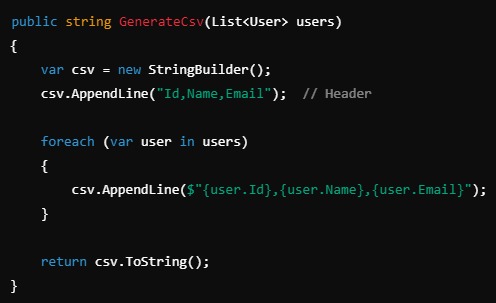
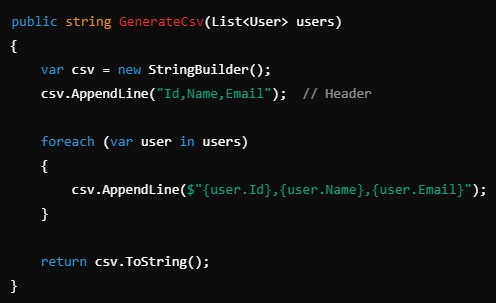
Create the CSV Content
In this step, we’ll create a method to generate CSV content from the data list. This will be a string where each line corresponds to a row in the CSV file, and the properties of the objects are separated by commas.

Implement CSV Download Logic
Now we need to implement the logic to trigger a CSV download in Blazor. Since Blazor WebAssembly doesn’t have direct access to the filesystem, we’ll use JavaScript to prompt the download.
Step 1. JavaScript Function for Download.
Either create a javascript file as a separate file and add its reference to the _host.cshtml or add the javascript file directly in the _host.cshtml file.
Step 2. Create a Blazor Component for CSV Download.
Now, create a Blazor component (e.g., DownloadCsv.razor) with the logic to trigger the download.


